

How to deploy Ubuntu on VMware for free. In this guide, I’m describing how I deploy an Ubuntu server on VMware ESXi free version. The goal of this project is to have a place to host various application from home for *free*. Of course I already had bought the physical servers I use, pay for the electricity to run them, and pay for the internet access needed. Aside from that cost, the goal is to host websites and other applications for free from home / whatever location I install the servers.
Deploy VMware ESXi
VMware has a version of ESXi that is free. You just have to register with VMware to get the free ESXi license version. ESXi is a bare-metal hypervisor. For example: on my Dell PowerEdge server I install ESXi to that physical server. Hence, the bare-metal qualifier. As a hypervisor, ESXi can host virtual machines (VMs). That is where the Ubuntu server will come into the picture.
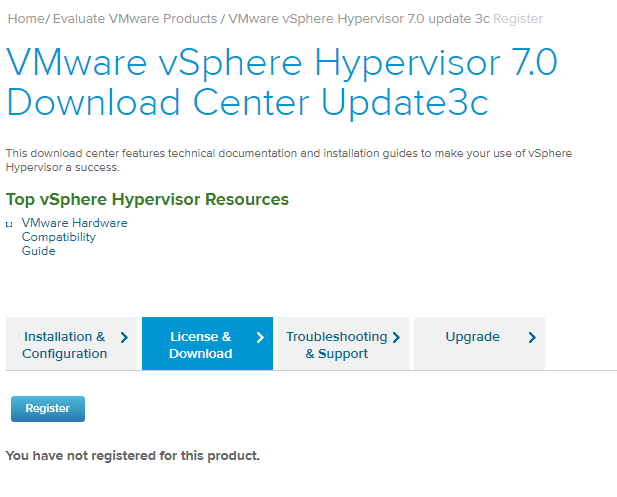
Download the latest / supported version of ESXi from VMware’s site. You must create a customer account with them to download the OS. Then you will need to register for that product from VMware.
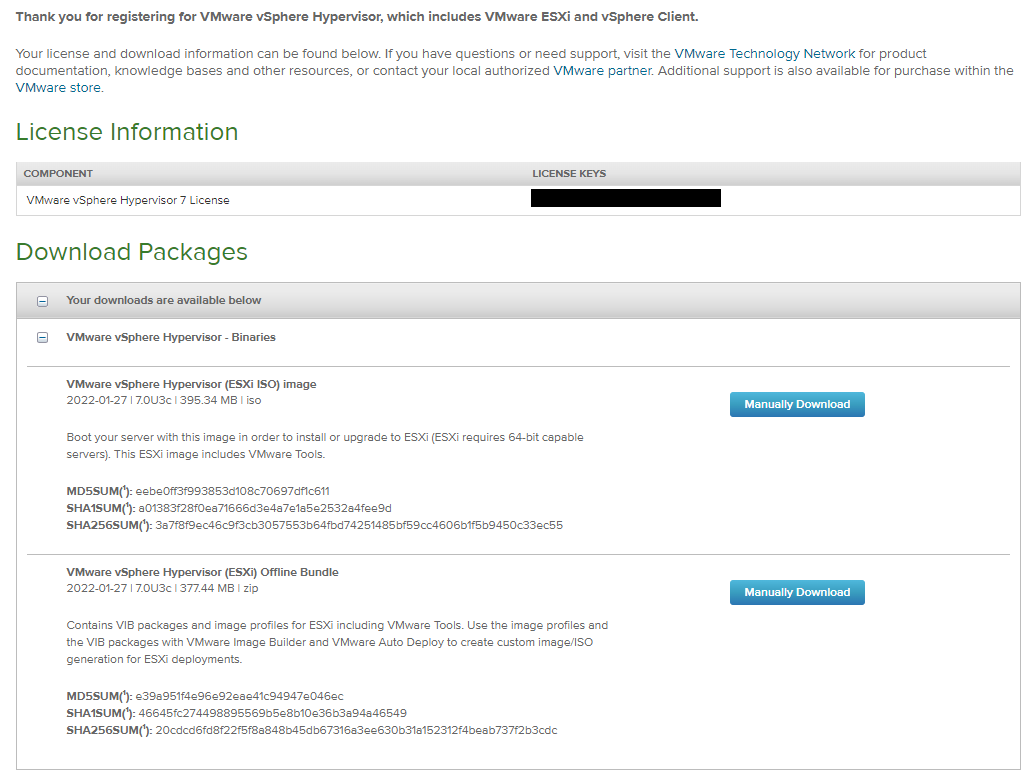
After registering you should be able to refresh and get the download link and a license key. The free license key disables the fancy features from VMware but they are not needed to deploy a simple VM.
Now deploy to your server of choice. Note that newer versions of ESXi will not work on older servers. If you are not sure, use the VMware compatibility guide here.
Deploy Ubuntu on VMware
Once you have VMware ESXi installed on a host now you can create an Ubuntu VM.
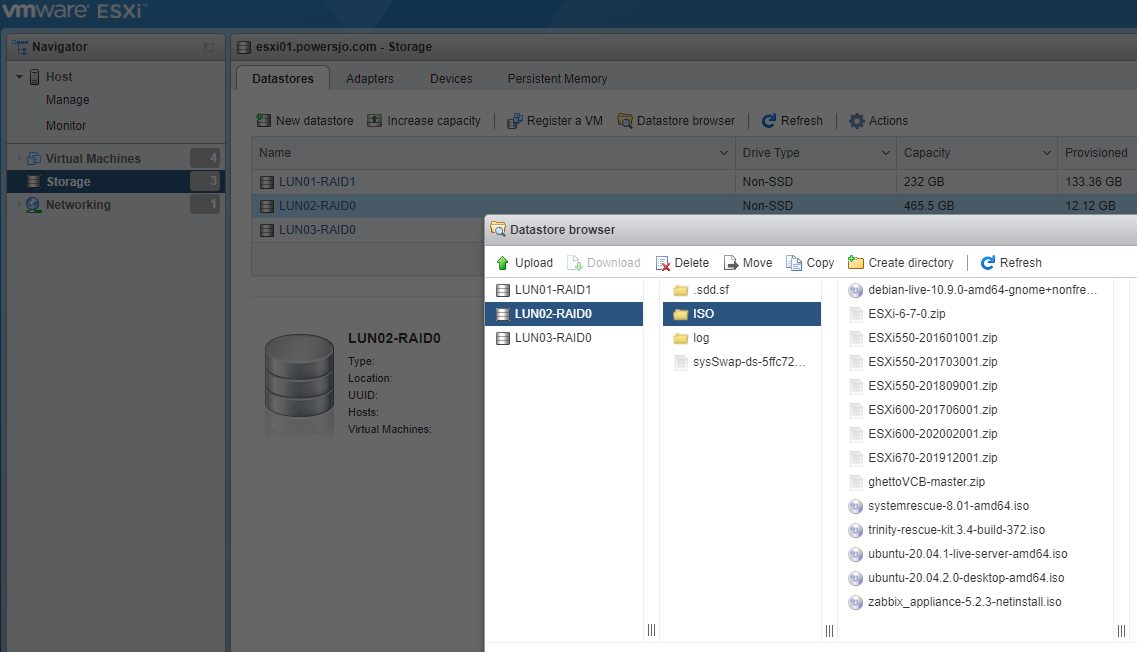
I downloaded an ISO of the latest version of Ubuntu server here. After you download the ISO upload it to a datastore in VMware. Navigate to storage > datastores > pick your datastore > open the datastore browser > select your folder and then > upload.
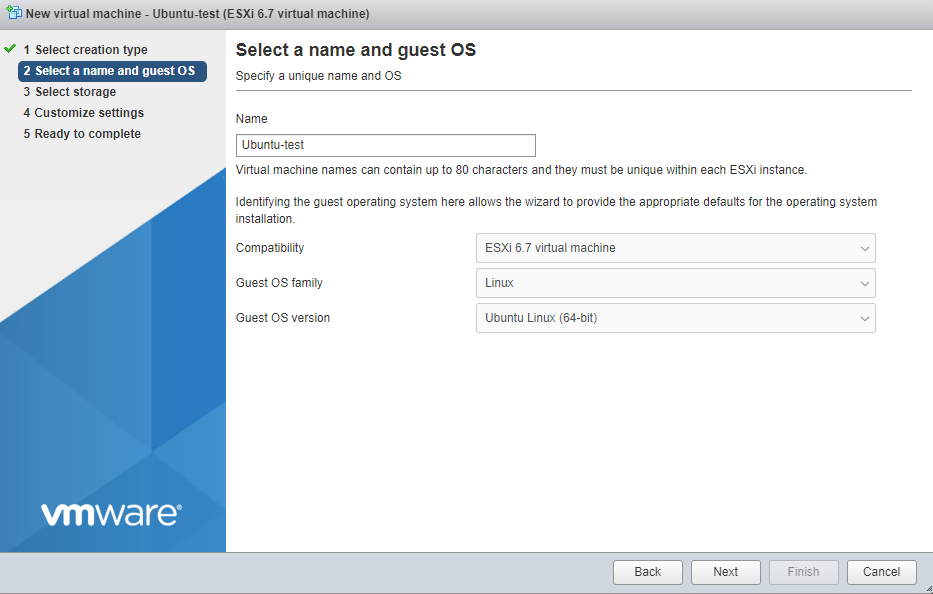
Next step is to deploy a VM with the Ubuntu ISO attached. Right click on the host and create a new vm.

Name the VM, select the appropriate Guest OS family and version.
Select the storage to store the VM. Edit the specs of the VM as needed. Ensure you select “Datastore ISO file” for the CD drive.
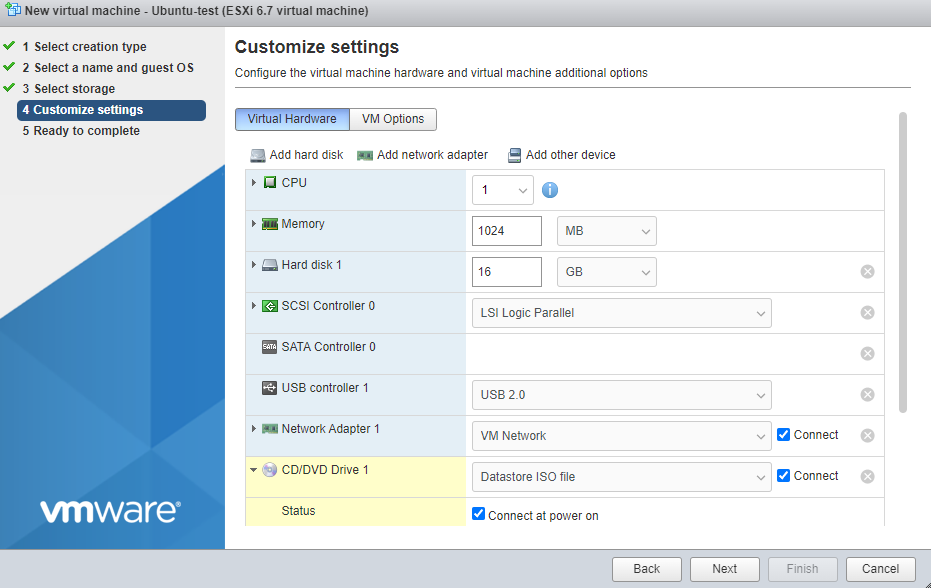
Navigate to the ISO you uploaded to your datastore and attach it. Select “Next” and then “Finish”. This will create the VM, last step is to power it on and open a console to install Ubuntu and use the server as needed.
If you need some ideas on what to use your Ubuntu server for, check out my blog here for an idea to host your own NTP server.
Enter your address to subscribe to this blog and receive notifications of new posts!
People get crypto to read and post blogs. Publish0x is like Medium but the author and the reader get tips. Use my referral link below and check it out.
God bless you!
You must be logged in to post a comment.